
Jewelry identification
Identify Antique Jewelry by Era, Setting and Stone
Jewelry dates itself through the way it was built. A clasp, a hinge, the shape of a setting and the culet of a diamond each belong to a span of decades, and together they place a piece within a generation before style is considered at all. This page is the fast visual route through that evidence, front and back.
It is published by the makers of RelicLens, an iPhone app that identifies antiques from one photograph and returns the likely period, origin, materials and category with a reference value, a condition grade, a rarity read and comparable listings you can open.
Last reviewed 7 September 2026
- 1
Shoot the front close and diffused
Get as near as the lens will hold focus, using daylight softened through a curtain or a sheet of paper rather than direct sun or flash. Tilt the piece so the light rakes across the metal instead of bouncing straight back, and put a coin in the frame so the scale is fixed.
- 2
Turn it over and photograph the back
The back of a piece of jewelry is where it was actually built: the clasp, the hinge, the gallery, the solder seams and the way each stone is held. One clear frame of the reverse dates a piece more reliably than the front does.
- 3
Date by construction, then read the range
A report returns the likely period, origin, materials and category with a reference value, a condition grade, a rarity read and comparable listings. Check that period against the clasp, the setting and the cut of the stones, which is the sequence a dealer follows.
Construction dates a piece; style only suggests a date
The most useful fact about antique jewelry is that the workshop moved faster than the fashion. Metals, settings, clasps and cutting wheels each changed at a known moment, and a jeweler in 1880 could not use a fitting that would not be invented until 1905. Style, by contrast, was revived constantly. The Victorians revived Etruscan granulation, the 1920s revived Egypt, the 1970s revived Art Nouveau, and every decade since has revived Art Deco.
So read the piece in this order, and let each step narrow the last. Construction first, because it is a hard boundary. Stones second, because cuts belong to date ranges. Style third, as confirmation rather than as proof. Worked that way, most pieces settle into a twenty or thirty year window from a photograph of the front and one of the back.
The eras and their signatures
Seven windows cover almost everything you will handle. Read the table across a row, then read the two or three sentences below on whichever row your piece is closest to.
| Era | Metal | Setting and construction | Stones and cuts | Tells |
|---|---|---|---|---|
| Georgian, 1714 to 1837 | High karat gold, silver, and silver topped gold. Everything hand fabricated. | Closed backs with foil behind the stones, collet and cut down settings, fine gold wirework and repoussé. | Rose cut, table cut and old mine cut diamonds. Garnets, topaz, paste, seed pearls. | No safety catch. Visible file and tool marks. Asymmetry between matching elements, because each was made by hand. |
| Victorian, 1837 to 1901 | Yellow gold in 9, 12 and 15 karat, plus a great deal of silver late on. | Closed backs give way to open claw settings after about 1850. Star settings and flush gypsy settings arrive late. | Old mine and old European cuts, cabochon garnet, turquoise, jet, onyx, coral, seed pearl. | C-clasp with a pin stem that runs well past the edge, tube hinges, mourning and sentimental motifs, hair work, snake and hand motifs. |
| Art Nouveau, 1890 to 1910 | Gold used as a drawing line rather than as bulk, often with enamel. | Enamel does the work: plique a jour, where translucent enamel is held in an open frame like stained glass. | Moonstone, opal, baroque pearl, horn, glass. Chosen for effect rather than carat. | Asymmetry, flowing whiplash lines, dragonflies, orchids, irises, peacocks, women with loose hair. |
| Edwardian, 1901 to 1915 | Platinum, sometimes over gold, worked as thin as it will go. | Lacy pierced openwork, milgrain beading along every edge, knife edge wire, pierced galleries under the stones. | Old European cut diamonds and pearls, in a white on white palette. | Garland motifs: bows, ribbons, laurel swags, tassels. Almost no color anywhere in the piece. |
| Art Deco, 1920 to 1935 | Platinum and white gold. Yellow gold is rare in the period. | Channel and box settings, calibre cut stones fitted edge to edge, geometric plaques and stepped forms. | Transitional and old European cut diamonds, baguettes, emerald cuts, single cuts, plus onyx, coral, jade and lab grown ruby and sapphire. | Straight lines and mirror symmetry, strong color contrast, Egyptian and Asian influence, dress clips and double clip brooches. |
| Retro, 1935 to 1950 | Rose and yellow gold return as platinum goes to war work. | Bold sculptural volume, often hollow to keep the weight down. | Large aquamarine, citrine, amethyst and lab grown ruby. Diamonds used as accents. | Scrolls and ribbon bows, gas pipe and tank track links, fold over clasps, oversized cocktail rings. |
| Mid century, 1950 to 1970 | Platinum and white gold return alongside textured yellow gold. | Illusion settings that make a small diamond read larger, plus modernist silver in Scandinavia and Mexico. | Modern round brilliants, marquise and pear cuts, turquoise, coral. | Starburst and spray brooches, atomic and abstract forms, post and clip earrings rather than screw backs. |
Georgian
Georgian jewelry was made entirely by hand, and it shows in the best way. Look for closed backs, where each stone sits in a sealed metal cup over a layer of foil that pushed color back through the gem before electric light existed. Rose cut and old mine cut diamonds sit in silver collets even when the rest of the piece is gold, because silver read whiter by candlelight. Matching elements never match exactly. If a brooch has a safety catch, it was added later.
Victorian mourning and sentimental work
The Victorian period runs long enough to need splitting into three. The early years are delicate and romantic: seed pearls, snake motifs, cabochon garnets, hollow repoussé gold that feels lighter than it looks. The middle years are the mourning and archaeological revival era, in jet, black enamel, onyx and woven hair, alongside heavy Etruscan revival gold covered in granulation. The late years turn light and silvery: bar brooches, star and crescent motifs, small diamonds in star settings.
Sentimental jewelry is its own vocabulary and worth learning, because it changes what a piece is. A glazed compartment on the reverse held hair or a miniature. An engraved date and initials inside a band puts a name to the piece. Acrostic settings spell a word through the first letters of the gems, so ruby, emerald, garnet, amethyst, ruby and diamond reads as a word rather than as a random palette.
Art Nouveau and Edwardian
These two overlap in time and oppose each other completely in character, which makes them easy to separate. Art Nouveau is asymmetric, colorful and made of whatever produced the effect, with enamel doing most of the work and horn, glass and moonstone treated as equal to diamond. Edwardian is symmetrical, white and made of platinum, worked into lace: pierced openwork panels, milgrain beading running along every edge, knife edge wires that nearly disappear. If a piece is white, delicate and covered in tiny beaded edging, it is Edwardian or made in the Edwardian manner.
Art Deco, Retro and mid century
Art Deco is geometry with a hard edge: platinum plaques, calibre cut colored stones fitted like tiles, baguettes, onyx against diamond, mirror symmetry. Retro reverses almost all of it. With platinum diverted to the war effort, gold came back in rose and yellow, and volume replaced precision: broad scrolls, ribbon bows, gas pipe links, and huge pale gemstones cut to fill space. Mid century brings the white metals back for sprays and starbursts and adds the illusion setting, a shaped white head that makes a modest diamond look considerably bigger.
Settings as evidence
A setting has a job, and how it does that job dates it precisely.
- Closed back and foiled. The stone sits in a sealed cup with foil behind it. Georgian into the early Victorian years, and a firm sign of pre 1850 work.
- Collet and cut down. A band of metal wrapped around the stone and worked down over its edge. Georgian and Victorian.
- Open claw or prong. Metal fingers holding the stone with the back left open so light passes through. General after about 1850 and standard by the 1870s.
- Star and gypsy settings. The stone dropped flush into the metal, with an engraved star radiating from it. Late Victorian.
- Milgrain and pierced galleries. Fine beaded edging and lacework cut out behind the stones. Edwardian.
- Channel and calibre. Stones cut to shape and set shoulder to shoulder between two walls of metal. Art Deco onward.
- Illusion settings. A faceted white metal collar around a small stone to widen its apparent size. Mid century.
One more distinction is worth training your eye on: fabricated versus cast. A hand fabricated piece was assembled from separately made parts, so you can find solder seams, faint file marks and slight differences between elements that should be twins. A cast piece came out of a mold in one go, so the surface can be very slightly grainy, and there may be a faint seam or the ghost of a sprue where metal entered. Casting in volume belongs to the twentieth century.
Closures and findings, the fastest date in jewelry
Findings are the small mechanical parts, and they are the single most efficient thing to look at because they were manufactured rather than designed. Each one entered use at a known point.
- C-clasp. An open hook with nothing holding the pin in. Nineteenth century into the very early twentieth.
- A pin stem longer than the brooch. The stem extending well past the frame belongs to pre 1900 dress, where it had to cross thick fabric.
- Trombone clasp. A tube that pulls out from a cylinder to free the pin. Largely European, about 1850 into the 1930s.
- Rotating safety catch. A collar that turns over the pin to lock it. From about 1900, standard from the 1920s.
- Hinges. A hinge built from soldered tubes is earlier. Stamped and riveted hinges are later and machine made.
- Earring fittings. Shepherd hooks and kidney wires are early. Screw backs run from the 1890s to the 1940s, clip backs from about 1930, and posts with butterfly backs from the 1950s.
Findings do get replaced, and a replacement is easy to spot: the solder is brighter, the metal color is slightly off, and the fitting looks newer than everything around it. Read it as a repair rather than as a date, and let the rest of the construction rule.
Cut styles as a date range
Diamond cutting improved steadily, so a cut is a clock. Look straight down through the table at the bottom of the stone.
- Rose cut. Flat back, domed top, triangular facets. Sixteenth century onward, and used throughout Georgian and Victorian work.
- Old mine cut. Squarish cushion outline, high crown, small table, and a large open culet that shows as a clear circle at the center. About 1750 to 1900.
- Old European cut. Round outline with the same high crown, small table and open culet. About 1890 to 1930.
- Transitional cut. Round, with a bigger table and a small culet. The 1920s to the 1940s.
- Modern round brilliant. Large table, shallow crown, pointed culet with nothing visible through the middle. From the 1940s.
- Single or eight cut. Eight crown facets on a small stone, used by the dozen in Art Deco pieces.
- Baguette, emerald and calibre cuts. Step cut rectangles, from the Art Deco period onward.
The open culet is the fastest of these to use. If you can see a small circle where the point of the stone should be, the diamond was almost certainly cut before about 1930, and a diamond of that age in an original mounting carries a premium over the same weight recut to modern proportions.
What to look at on the back
Turn every piece over. The reverse is the workshop drawing, and it answers questions the front cannot.
- Whether the settings are open or closed. Light through the back is later work. Sealed cups are earlier.
- Solder seams and color shifts. A slightly different gold tone at a joint is where two hand made parts met.
- Signs of conversion. Solder scars where a pin assembly was removed, or an added bail on a brooch, mean the piece has been converted to a pendant. That is common and it changes the value.
- Compartments and glazing. A glazed locket back or a hair compartment tells you the piece is sentimental or mourning jewelry.
- Wear in the right places. Genuine age wears the high points and leaves the recesses crisp. Even wear everywhere, or crisp high points with dirty recesses, is worth a second look.
- Inscriptions. Dates, initials and mottoes inside a band or on the reverse of a brooch are the best provenance a small object can carry.
How to photograph jewelry
Small objects need a different discipline from large ones, and three adjustments cover most of it.
- Diffuse the light. Daylight through a thin curtain, a sheet of paper or a white bag turns the hard glints on polished metal into readable highlights. Direct sun and flash both bleach detail away.
- Get close, and hold still. Use the nearest focus your lens manages, brace the phone against a book or a table edge, and prop the piece at a slight angle so light rakes across the surface rather than reflecting into the lens.
- Choose the ground for the metal. Silver and platinum read best against mid gray or a dark plain surface. Jet, onyx and dark enamel need a pale one. Patterned cloth competes with the piece and helps nothing.
- Shoot the back as a second frame, filling it with the clasp, the hinge and the gallery. That frame is where the date lives.
- Put a coin in the picture. A brooch two inches across and one four inches across look identical alone, and they are not worth the same.
The wider photography rules for every category are set out on our identify antiques by photo page.
What comes back, and how to use it
A report gives you a reference value with a low and a high estimate, a rarity read on five levels from common to exceptional, a condition grade on five levels from poor to excellent, the likely period, origin and materials, the category the piece falls into, a written summary and history, and comparable listings that open in your browser.
For jewelry, put the period beside the findings you have just examined. When the report says Edwardian and the back shows milgrain, a pierced gallery and platinum, those two agree and the range is standing on firm ground. Then open the comparables and check they are the same era in the same metal with stones cut the same way, because a mounting of the right period is a large part of the price. How the estimate is produced is set out on our methodology page, and free antique appraisal options covers the other routes worth running alongside it.
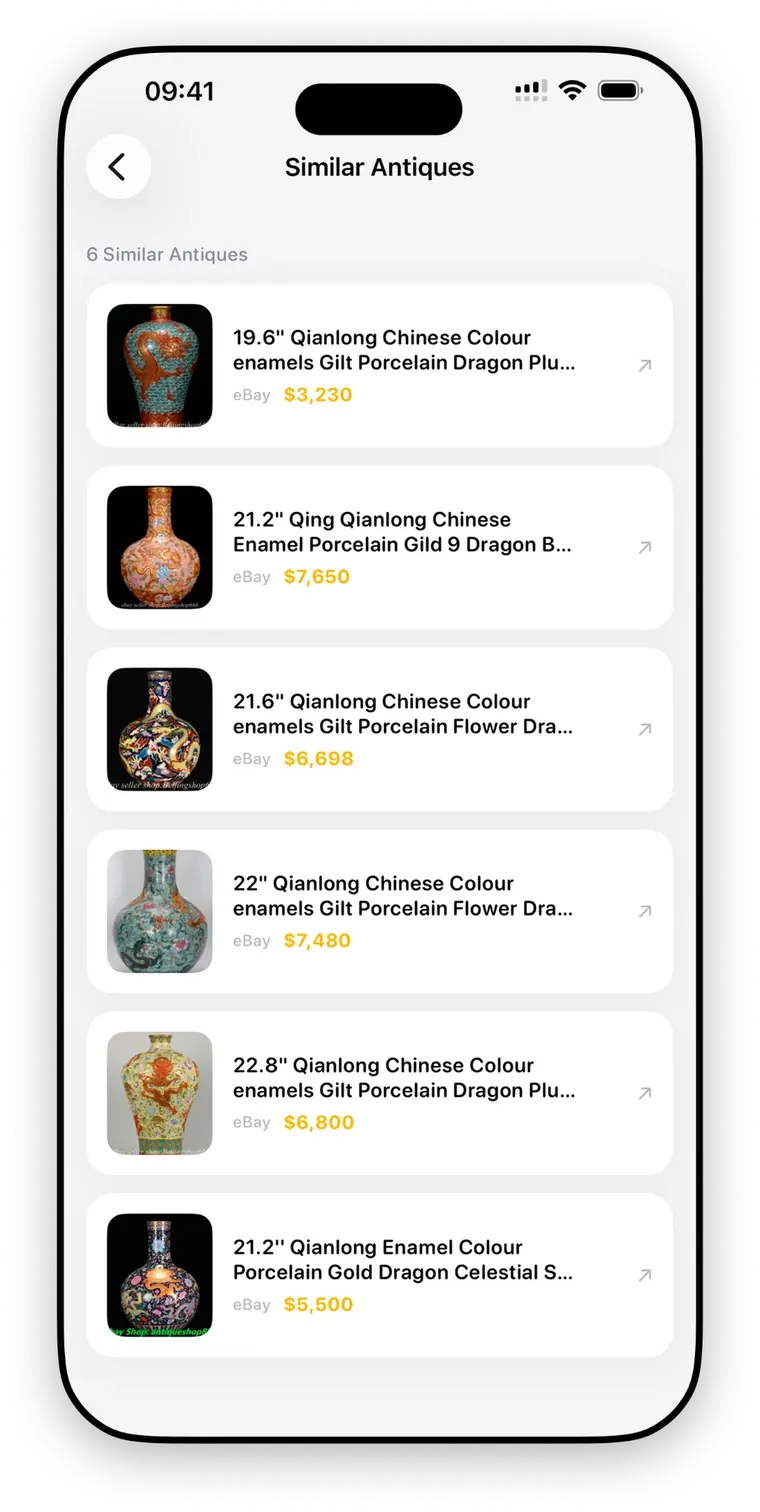
Comparables you can open and check
Each comparable listing carries a thumbnail, a title, the marketplace and the price, and it opens in your browser so you can judge the match yourself. One full report is included, and every field the app produces is in it.
Questions about identifying antique jewelry
How do I identify antique jewelry?
Date the construction first, because construction is the one thing a maker could not fake ahead of its own time. Look at the back: the type of clasp, the shape of the hinge, whether the stone settings are open or closed behind, whether the parts were soldered up by hand or cast in one piece. Then read the stones, since diamond cuts belong to date ranges. Then read the style, which tells you which era the design belongs to and often which country. That sequence, from construction to stones to style, is how a dealer works, and it is far more reliable than judging by look alone.
How can you tell how old a brooch is?
The clasp and the pin stem answer it in seconds. A simple open C hook with no safety mechanism, and a pin stem that extends well beyond the edge of the frame, means the brooch was made before about 1900, when the pin had to pass through heavy fabric. A tube pulled out from a cylinder to release is a trombone clasp, mostly European and mostly 1850 to the 1930s. A rotating collar that locks the pin in place is a safety catch, in use from about 1900 and standard from the 1920s. Then check the hinge: soldered tube hinges are earlier, stamped and riveted hinges later.
What is a C-clasp on antique jewelry?
A C-clasp is the earliest brooch fitting still commonly seen: a small open hook, shaped like the letter C, that the pin drops into with nothing to hold it there. It belongs to the nineteenth century and the very start of the twentieth, and paired with a long pin stem it is one of the strongest pre 1900 indicators on any brooch. One caution worth carrying: findings get replaced. A modern safety catch soldered onto a Victorian brooch shows as brighter solder and a slight difference in metal color, and the rest of the construction still tells you the true age.
How do you date a diamond by its cut?
Look down through the table at the point of the stone, because the culet gives the date away. Old mine cuts, roughly 1750 to 1900, have a squarish cushion outline, a high crown, a small table and a large open culet that reads as a distinct circle at the bottom. Old European cuts, roughly 1890 to 1930, are round with the same high crown and open culet. Transitional cuts bridge the 1920s to the 1940s. The modern round brilliant, from the 1940s, has a larger table, a shallower crown and a culet ground to a point, so nothing shows through the middle. Rose cuts, flat backed and domed with triangular facets, run from the sixteenth century onward.
What do the marks 9k, 15k, 800 and sterling mean on old jewelry?
They are metal standards, and several of them carry dates. Fifteen karat and twelve karat were legal British gold standards only between 1854 and 1932, so those two numbers pin a piece inside an eighty year window on their own. Nine karat also began in 1854 and is still used. Eight hundred is a continental European silver standard of 800 parts per thousand, common in Germany, Austria and Italy. Sterling is 925 parts per thousand. American karat stamping became widespread after federal stamping rules in 1906, so an unmarked American piece often predates it. For the punches themselves, our guide to antique marks sets out how each family was applied and what it encodes.
Is antique jewelry worth more than the gold in it?
Frequently, yes, and the gap can be large. Melt value is a floor, not a valuation: a signed Art Nouveau enamel pendant, an Edwardian platinum openwork brooch or a well cut old mine diamond in its original mounting is worth a multiple of its metal because the design, the period, the cutting and the maker all carry value that weight does not capture. This is why identification matters before anything is sold by weight. A single photograph gives you a reference value with a low and a high estimate plus comparable listings, which is enough to know whether a piece belongs anywhere near a scrap conversation.
How do I photograph jewelry for identification?
Get close, keep the light soft, and shoot the back as well as the front. Use the closest focus your lens will hold, brace the phone against something solid, and light the piece with daylight diffused through a curtain, a sheet of paper or a white bag, which turns hard reflections into readable highlights. Tilt the piece so the light skims the metal rather than bouncing back into the lens, and turn the flash off. Silver and platinum photograph best on a mid gray or dark ground; dark pieces such as jet and onyx need a pale one. Add a coin for scale, since size changes value substantially.
Photograph the back, not just the front
One full report is included. Start with the piece nobody in the family can date, and check the period against the clasp while you have it in your hand.
Download on the App Store